PearPC or Running a PPC Mac OS X on Intel
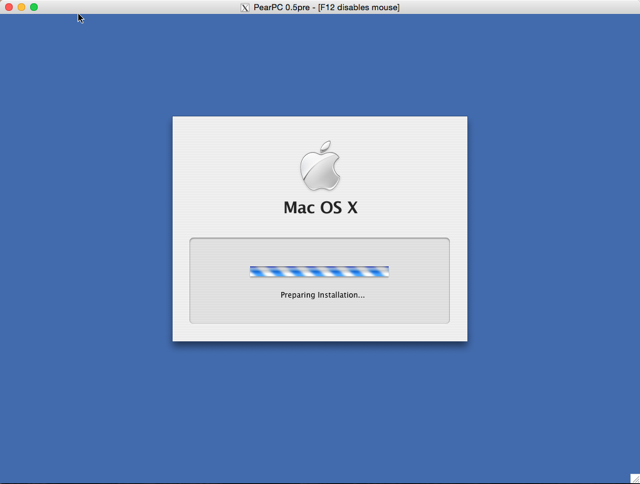
Since the switch to Intel processors, some emulators have been ported to our macOS platform. PearPC is one of them. Its purpose is to emulate a G3 or G4 with all the useful instructions for OS X on an Intel architecture. The recommended macOS build is the one that does not manage JustInTime (JIT) as this feature causes the emulator to crash at startup.

Note that using PearPC is not necessarily the simplest option. If you can settle for an Intel Mac OS X 10.5 or 10.6 with Rosetta for PPC emulation, perhaps it would be wiser to look at VirtualBox. If the goal was to ultimately emulate Mac OS 9, then Sheepshaver is what you need.
Still here? Then if you are not afraid to get your hands into the terminal and have X11 installed, let's begin.
Installation and Configuration
The first step is to retrieve the files that the emulator will need, namely:
- nvram
- video.x
- ppccfg.conf
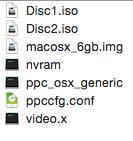
To do this, retrieve the Windows version of the emulator from the official website and copy these files next to your macOS binary (the config file may have a different name, it doesn’t matter).
Of course, you will also need the disk images of your chosen PPC macOS system. For information, we tested versions 10.3 and 10.4. For convenience, copy them into the same directory as the emulator.
Finally, you need to create a disk image of your hard drive using the terminal. To make the image usable as a hard drive by PearPC, you will need to create an image whose size is a multiple of 516096. As the official documentation states, to create a 3GB disk, you will need to run the following command:
dd if=/dev/zero of=myharddisk.img bs=516096 seek=6241 count=0dd if=/dev/zero of=myharddisk.img bs=516096 seek=12482 count=0dd if=/dev/zero of=myharddisk.img bs=516096 seek=XXXX count=0- ppc_start_resolution: Corresponds to the resolution you want, and is written as "<width>x<height>x<colors>@<frequency>". By default, the value is "800x600x15", but you can easily set it to "1024x768x32". For the frequency, feel free to test if you are in full-screen mode (which is not recommended due to keyboard key mapping issues).
- ppc_start_full_screen: Allows you to switch to full-screen mode if the value is 1; by default, it is 0 for windowed mode (which I recommend for the reason cited above).
- prom_bootmethod: Boot method of the emulator; by default, it is set to "auto" but as long as your OSX is not ready, set it to "select". There is also "force", but I do not use it either, as it requires a more complex configuration.
- prom_driver_graphic: Video driver file.
Its value must be "video.x" and the file must be present next to the executable.
- cpu_pvr: This parameter allows you to emulate either a G3 by default with the value 0x00088302, or if you prefer a G4 by setting the value to 0x000c0000, but be aware that G4 emulation is still experimental, and there may sometimes be display errors.
- memory_size: This corresponds to the RAM you wish to allocate to the machine. The value is written in hexadecimal. For 1GB, the value will be 0x40000000; for 512MB, you must enter 0x20000000; for 256MB, write 0x10000000. The default value, 0x08000000, corresponds to 128MB, with a minimum of 64MB, i.e., 0x04000000.
- nvram_file: File containing the NVRAM. Its value must be "nvram" and the file must be present next to the executable.
Now you need to fill in the next parameters correctly, starting with those concerning the hard drive image.
- pci_ide0_master_installed: Indicates whether a drive is present or not. 1 for yes and 0 for no. The value must therefore be 1.
- pci_ide0_master_image: This is the path to the drive image. In my case, I just need to enter the value "macosx_6gb.img" since the file is in the same directory as the emulator.
- pci_ide0_master_type: Indicates what type of hardware should be mounted. For a hard drive, you must set the value to "hd".
Next comes the OS X installation CD image.
- pci_ide0_slave_installed: Indicates whether a device is present or not. 1 for yes and 0 for no. The value must therefore be 1.
- pci_ide0_slave_image: This is the path to the drive image. In my case, I just need to enter the value "Disc1.iso" since the file is in the same directory as the emulator.
- pci_ide0_slave_type: Indicates what type of hardware should be mounted.
For the rest, you won’t need to make any modifications, but for more information, refer to the official documentation.
Now that you’re ready, for the laziest among you, here are the essential files, including my configuration (G3 with 1GB of RAM at 1024x768x32) and a blank 6GB image.
Files for PearPC (Contains: nvram, video.x, ppccfg.conf, 6GB disk image
Booting and macOS X
With your images ready and your configuration set, it’s time to launch the emulator from the terminal. To do this, navigate to the directory where it is located using the 'cd' command and run it as follows:
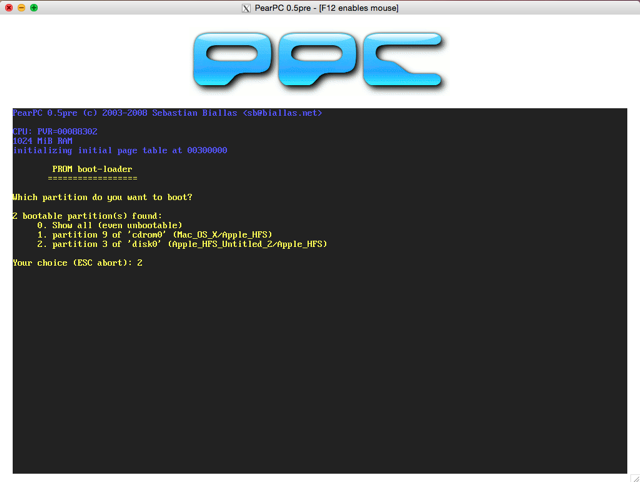
./ppc_osx_generic ppccfg.confThe following interface should appear.
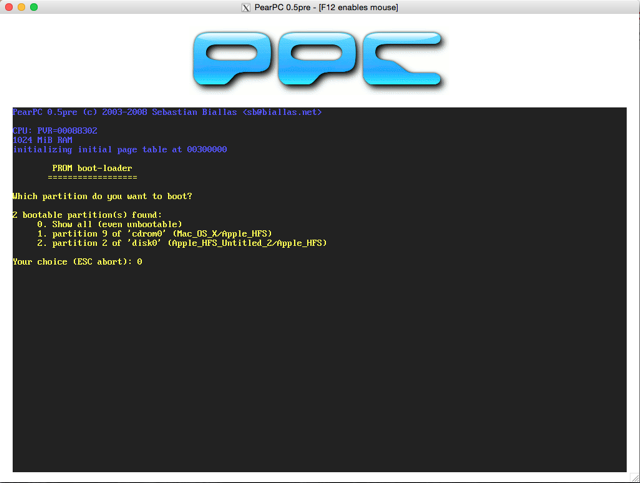
You will need to make an obvious choice, that is, boot from the CD, so choose option 1 and not the still blank disk (option 2). The major issue with this version of macOS X is that the keyboard is completely incomprehensible and it’s not a QWERTY layout (running in an X11 terminal by modifying keyboard settings didn’t help). For this step, the only thing to know for key conversion is as follows:
- d = 1
- f = 2
- h = 3
- g = 4
- w = 5
- x = 6
- c = 7
- v = 8
- @ = 9
- b = 0
- e = "reset"
- ! = = "Entry"
You need to type 'd!' on the keyboard to boot from the CD-ROM.
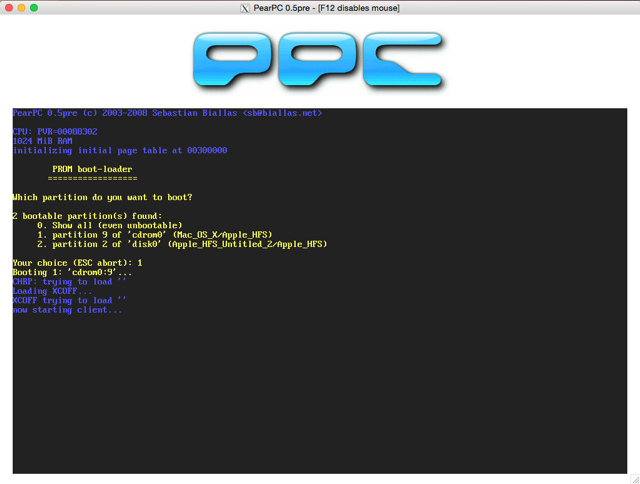
You will then see the apple logo followed by a long sequence of commands on a black background before the installer starts.

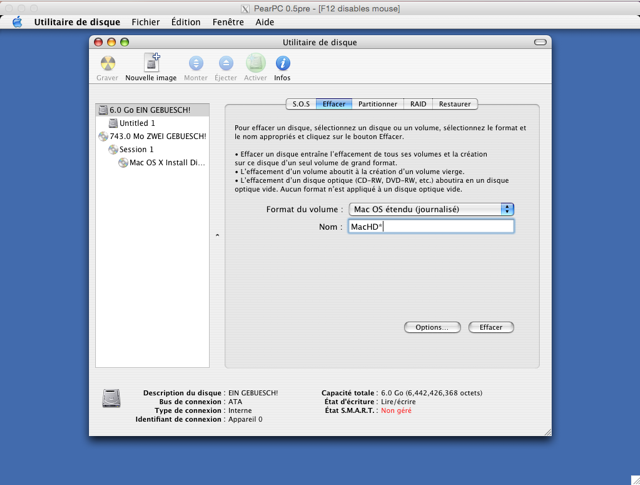
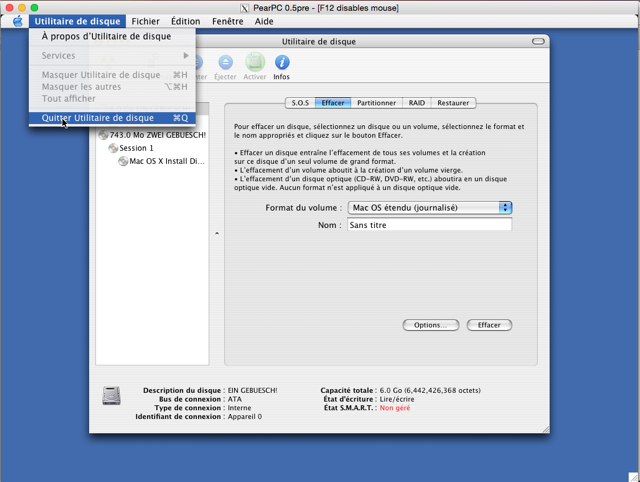
Remember that your disk image is blank, so you will need to initialize it to allow it to host macOS.
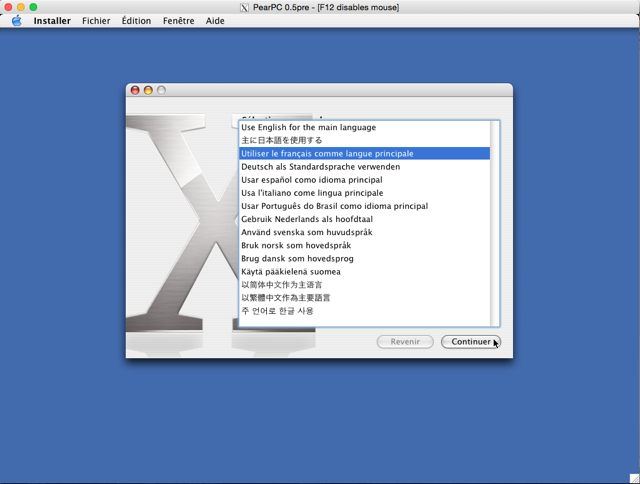
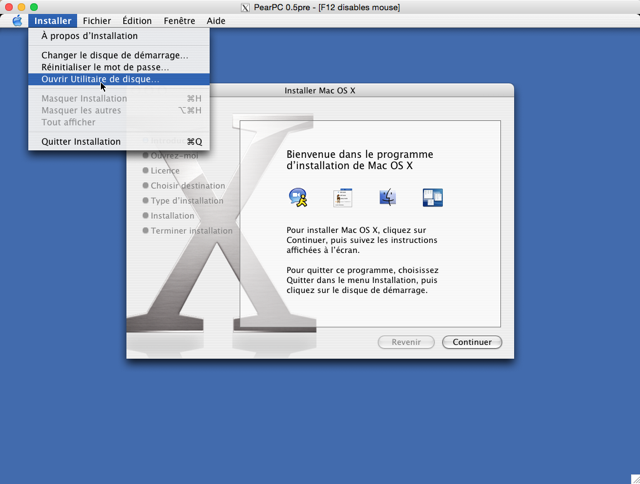
To do this, open Disk Utility, which may take some time to complete disk detection.
Format the presumed hard drive as "MacOS Extended (Journaled)". You are free to create partitions (see the key mapping if needed).
Once your disk is ready, you can exit the utility and resume your installation.
Important advice, especially if you plan to install macOS 10.4 or 10.3, customize it to use only the first two disks, as with subsequent disks, the installation will not resume, forcing you to start over from the beginning.
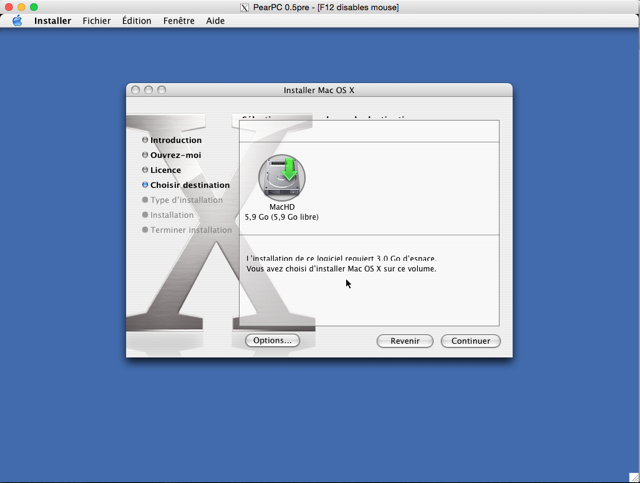
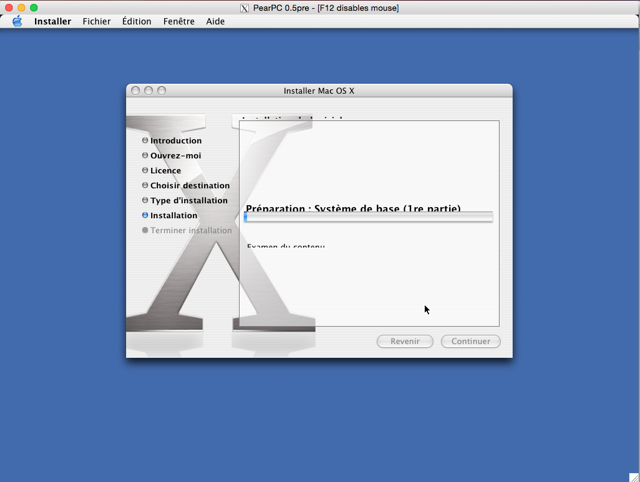
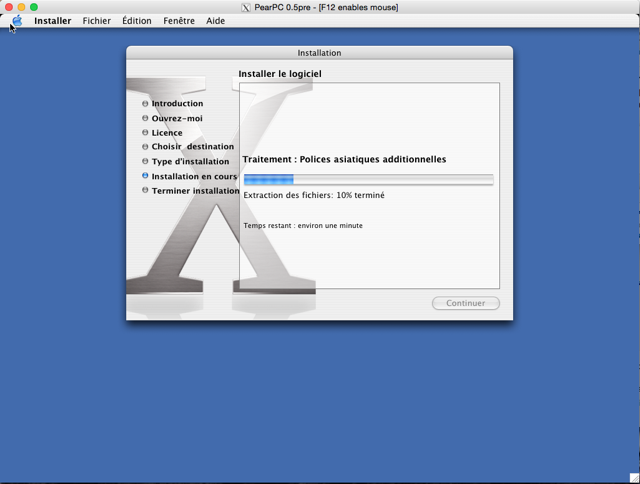
Despite some display issues, the installer does its job. This process will take more or less time depending on the desired system and selected components.
The critical moment arrives where the second CD is requested.
As mentioned earlier, you must not use any images other than the CD 1 and 2 if you want the installation to work.
Conclusion
This emulator, for its OSX port, is more of a technical feat than a practical tool. Don’t expect to play Warcraft III or Civilization IV with it, as the graphical emulation remains basic. However, if the latter improves, it could become a serious contender for anyone looking to fully emulate an OSX PPC.
A follow...
Keyboard Mapping on Laptops
| Physical Key | Emulated Key | Emulated Key with ` Pressed (Simulating Shift) |
|---|---|---|
| Esc | = | + |
| F5 | Down | Down |
| F6 | Page Down | Page Down |
| F7 | Num Lock | Num Lock |
| F8 | Enter (Numeric Keypad) | Enter (Numeric Keypad) |
| Right | F3 | F3 |
| Enter | j | J |
| Tab | b | B |
| Space | n | N |
| Shift Lock | Space | Space |
-* pci_ide0_master_type: Specifies the type of hardware to be mounted. For a hard drive, set the value to "hd". Followed by the OS X installation CD image. -* pci_ide0_slave_installed: Indicates whether a device is present or not. Use 1 for yes and 0 for no. The value must therefore be 1. -* pci_ide0_slave_image: This is the path to the disk image. In my case, I just need to enter the value "Disc1.iso" since the file is in the same directory as the emulator. -* pci_ide0_slave_type: Specifies the type of hardware to be mounted. For an optical drive, set the value to "cdrom". For the rest, you won't need to make any modifications, but for more information, refer to the official documentation. Now that you are ready, for those who are lazy, here are the essential files, including my configuration (G3 with 1GB of RAM at 1024x768x32) and a blank 6GB image.
Booting and OS X
With your images ready and your configuration set, it's time to launch the emulator from the terminal. To do this, navigate to the directory where it is located using the 'cd' command and launch it as follows:
./ppc_osx_generic ppccfg.conf
The following interface should appear.
You will need to make an obvious choice, that is, boot from the CD, so choose option 1 and not the still blank disk (option 2). The main issue with this OS X version is that the keyboard is completely unintelligible, and it's not QWERTY (running in an X11 terminal while modifying keyboard settings didn't help). For this step, the only thing you need to know for key conversion is as follows:
-* d = 1 -* f = 2 -* h = 3 -* g = 4 -* w = 5 -* x = 6 -* c = 7 -* v = 8 -* @ = 9 -* b = 0 -* e = "reset" -* ! = "Enter"
So, you need to type 'd!' on the keyboard to boot from the CD-ROM.
You will then see the apple logo followed by a long sequence of commands on a black background before the installer launches.
Don’t forget that your disk image is blank, so you’ll need to initialize it to accommodate macOS.
To do this, open Disk Utility, which may take some time to detect disks.
Format the presumed hard drive as "Mac OS Extended (Journaled)", and feel free to create partitions (see the keyboard mapping if needed).
Once your disk is ready, you can exit the utility and resume your installation.
Important advice, especially if you plan to install OS X 10.4 or 10.3, customize it to use only the first two disks, as the installation will fail with subsequent disks, forcing you to start over from the beginning.
Despite some display issues, the installer does its job. This process will take more or less time depending on the system you want and the components selected.
The critical moment arrives when the second CD is requested. As mentioned earlier, the installation should only use images from CD 1 and 2 if you want it to work.
For image inversion, unfortunately, there’s no choice but to stop the emulator and modify the configuration file by setting the path to the second ISO for the parameter `pci_ide0_slave_image`, which is "Disc2.iso" in this case. Simply restart the emulator with the same command as before and choose to boot from the hard drive this time. Pressing the 'f!' keys in our case will allow you to see the installation complete.
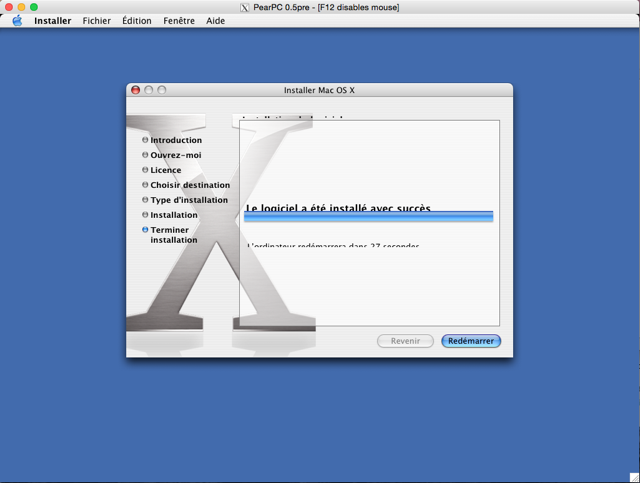
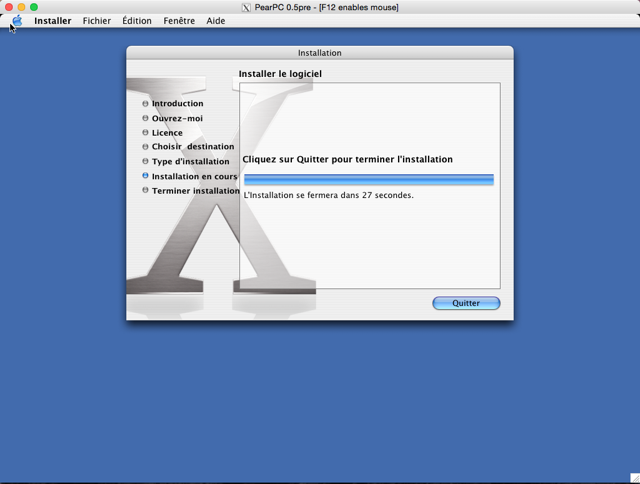
The installation will then resume normally.
And finish without any issues.
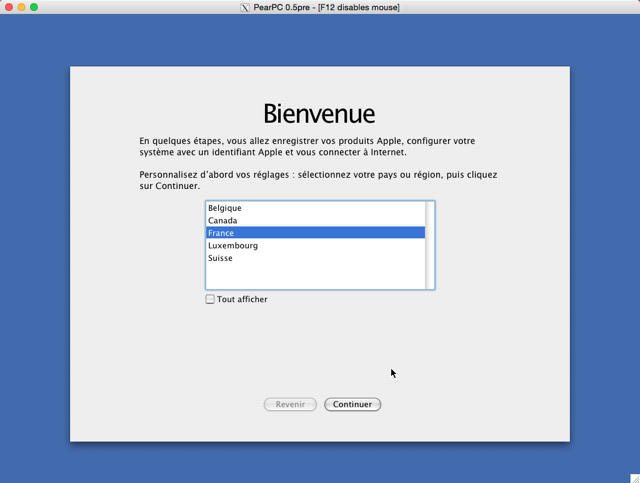
Here’s your installed OS X PPC with a rather chaotic keyboard mapping.
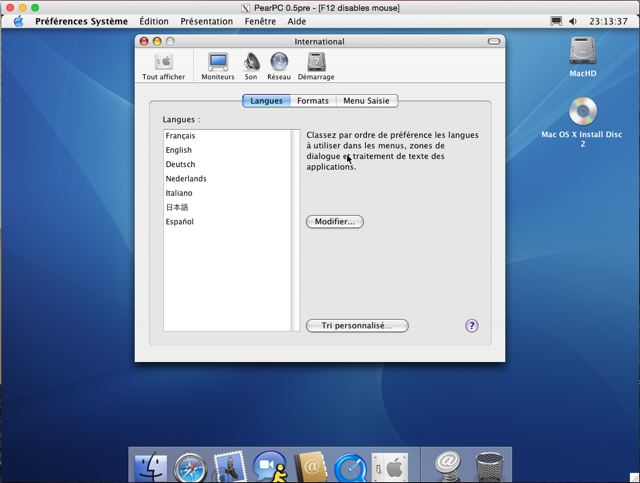
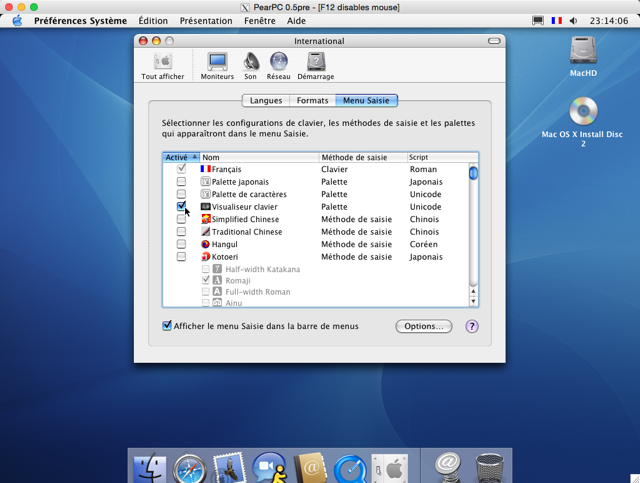
Since emulation isn’t always the fastest, it’s recommended to adjust some options in System Preferences, and especially, enable the Keyboard Viewer due to the "very special" keyboard recognition.
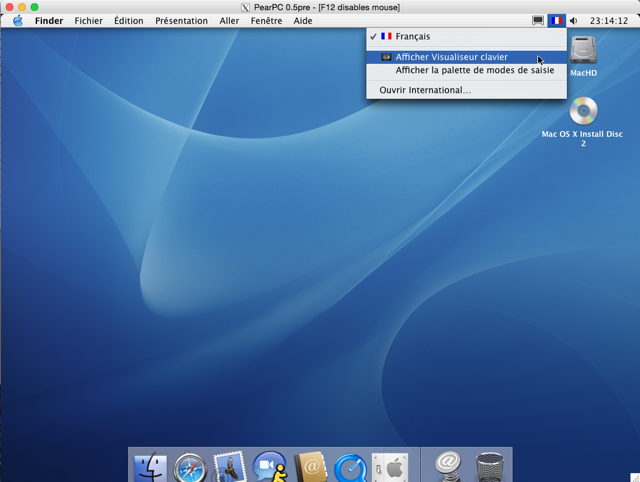
For this, in the "International" control panel, go to the "Input Menu" tab and click on "Keyboard Viewer".
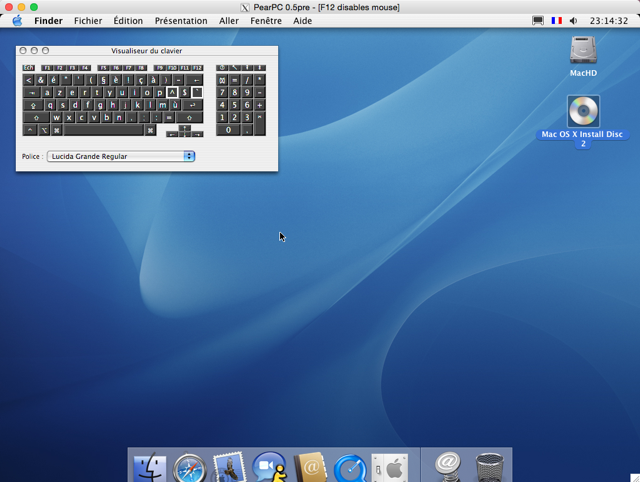
It is then available in the menu bar.
This makes the keyboard easier to use.
Conclusion
PearPC is no longer frequently updated, and the OSX version is far from perfect. Many aspects need improvement. First, the installation and disk changes require manual handling, but above all, the key mapping makes usage almost nightmarish, especially since basic host OS features are sometimes unavailable, such as copy/paste or drag and drop, forcing the use of the terminal with the known mapping (see the key mapping).
| Entry | Entry | | ç | p | P | | à | Ctrl | Ctrl | | ) | $ | * | | - | o | O | | a | ) | ° | | z | - | _ | | e | Backspace | Backspace | | r | Tab | Tab | | t | z | Z | | y | a | A | | u | d | D | | i | g | G | | o | s | S | | p | h | H | | A question or a hands-on report? Open the discussion on the forum.
This emulator, for its OSX port, is more of a technical feat than a practical tool. Don’t expect to play Warcraft III or Civilization IV with it, as the graphical emulation remains basic. However, if the latter improves, it could become a serious contender for those who want to fully emulate an OSX PPC. Keep an eye on it... [mapping<-]Key Mapping on Laptops
| Physical Key
| Emulated Key
| Emulated Key Pressing ` (simulating Shift)
|
| Esc | = | + |
| F5 | Down | Down |
| F6 | Page Down | Page Down |
| F7 | Num Lock | Num Lock |
| F8 | Enter (numeric keypad) | Enter (numeric keypad) |
| F9 | Ctrl | Ctrl |
| @ | | 9 |
| & | e | E |
| é | r | R |
| " | t | T |
| ' | y | Y |
| ( | i | I |
| § | u | U |
| è | ^ | ¨ |
| ! | |
^ | f | F | | $ | q | Q | | s | Esc | Esc | | d | & | 1 | | f | é | 2 | | g | ' | 4 | | h | " | 3 | | j | l | L | | k | ù | % | | l | k | K | | m | < | > | | ù | m | M | | ` | Shift | Shift | | < | , | ? | | w | ( | 5 | | x | § | 6 | | c | è | 7 | | v | ! | 8 | | b | à | 0 | | n | x | X | | , | c | C | | ; | ` | £ | | : | v | V | | = | w | W | | Left Shift | Command | Command | | Right Shift | F2 | F2 | | Ctrl | F1 | F1 | | Left Command | * | * | | Right Command | F5 | F5 | | Right Option | F3 | F3 | | Entry | j | J | | Tab | b | B | | Space | n | N | | Caps Lock | Space | Space |
Related software
Reply on the forum