Manipulating Disk Images under macOS (iso, dmg, bin, cue, and others)
While ROMs are generally more complex to create, they are usually easier to back up in the form of disk images, such as hard drives, digital CD/DVD discs, or floppy disks.
Over the years, tools have multiplied, and so have formats. It is not uncommon to find numerous different file formats for images of the same type of media.
On Mac, we are naturally accustomed to handling image files in formats such as img, dsk, dmg, cdr, or toast, and even iso, as well as bin/cue. However, there are other formats from different worlds outside the Apple ecosystem. As a result, after changing computers using different systems, you may end up with a collection of backup files in a variety of heterogeneous formats.
While this may not pose an aesthetic issue for most of you, having a common format for all images by type of media can be beneficial. Moreover, when trying to access the data from your past again, the emulator associated with the original machine may not recognize the disk image format. This is the most frustrating part, and one might wonder why another format was not chosen at the time.
The first possible solution is to recreate an image of the original media in the desired format, but this may sometimes require retrieving the machine from the attic, which may not always be functional, or asking for help from someone who still owns the machine if it is no longer in your possession.
The most widely used disk image format in the emulation world is undoubtedly the iso format, short for ISO-9660, which is the name of the standard. We will therefore attempt to convert other formats into this one. It is also often used in what is called the pivot format.
This is to say that for many other formats, there are tools available for converting files in both directions.For reference, you will find the sources of most of these tools, to compile and usable via the terminal, on https://github.com/defiant-labs/imagination.
- Create an ISO
- macOS Formats
- Bin/Cue
- Nero (nrg format)
- Others (b5i, cdi, mdf, ccd, pdi, uif)
- Cso (or PSP)
- Chd (MAME format)
- Ecm (container)
- Xbox ISO
Create an ISO
First, we will learn how to create an ISO from a CD-ROM or DVD-ROM.
The first method is to use the Disk Utility, here we will save our Windows game, Hexplore, and then be able to play it later via Wine or VirtualBox.
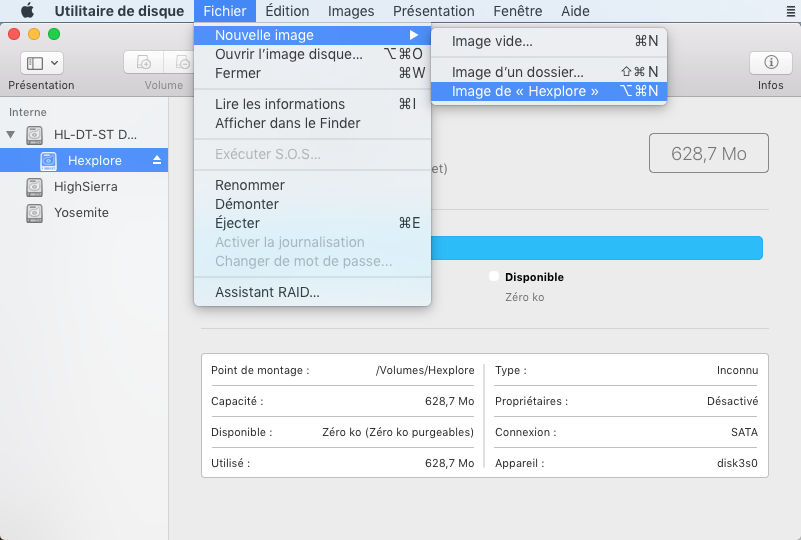
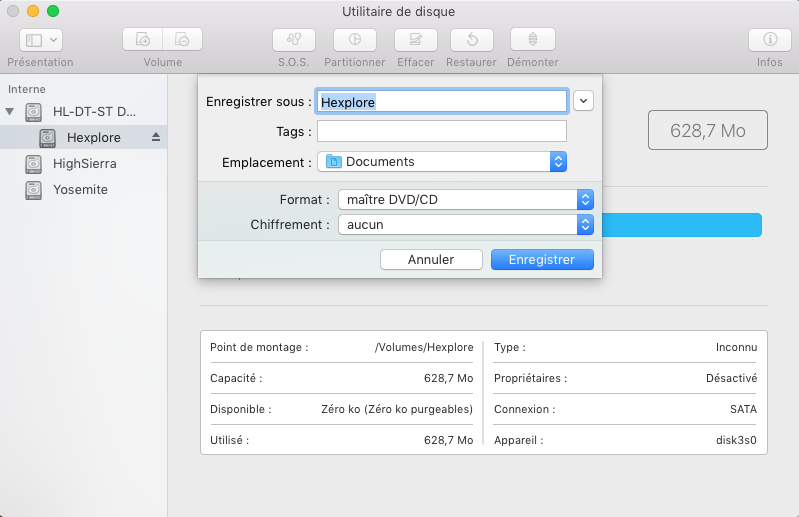
You will notice that the CD format is already noted as ISO 9660 by the utility; you just need to specify to the tool that you want to create an image of a CD/DVD and give it the desired name.
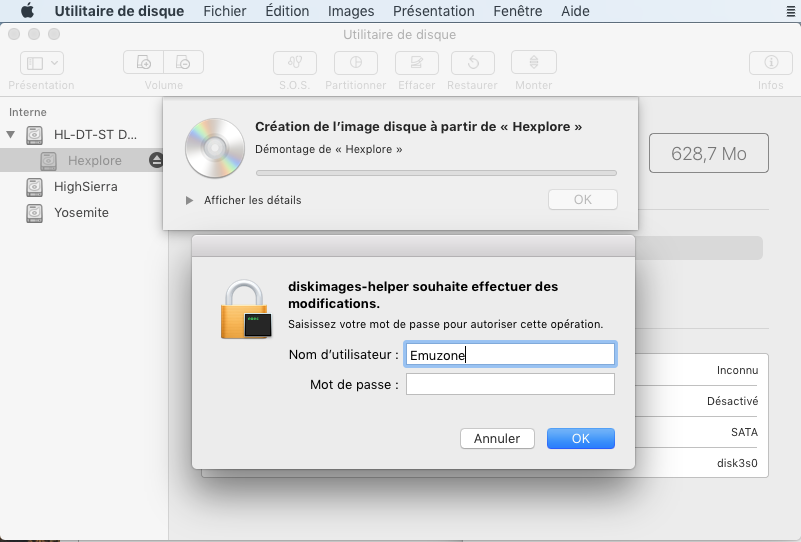
At the start of the procedure, administrator rights will be requested; otherwise, it will not be possible to complete the operation.
The operation should proceed without issues, and once completed, you can eject your media to store it carefully in its case and keep it jealously in your vault or game library.
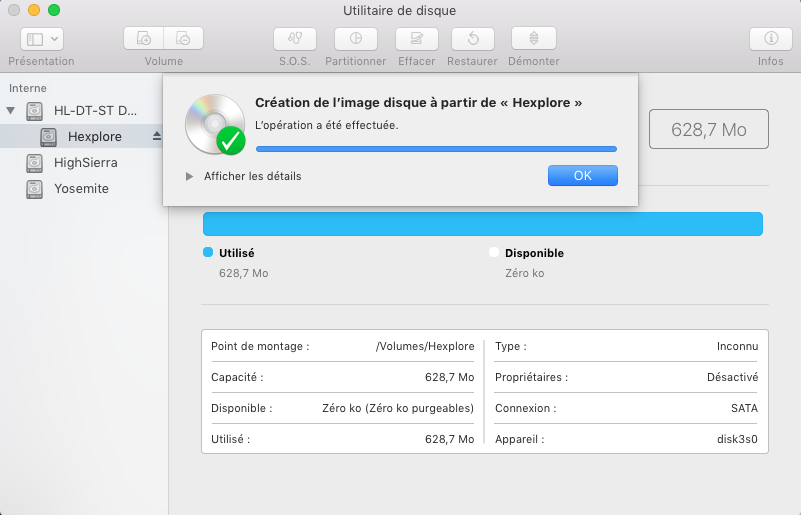
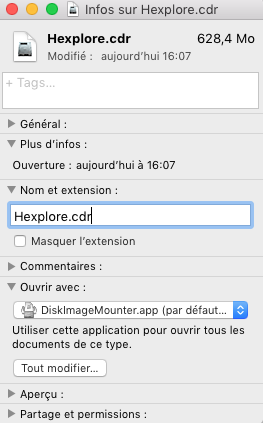
This results in a file with the .cdr extension. You can change the suffix to `.iso` if you prefer, since, as we mentioned earlier, the image was processed by the utility as complying with the standard.
The second method is more costly, as it requires you to own a license for Roxio Toast, the well-known Apple-branded burning software.
It allows you to generate disk images in a proprietary but widely recognized format within the Mac universe, natively by macOS, and named—with little originality—Toast.
This format is so similar to ISO, which also uses the standard, that by renaming it as previously mentioned, many software tools recognize it. However, the best solution to create a real ISO is undoubtedly to mount the Toast image via Roxio software and then create an image using the Disk Utility, as in the first method.
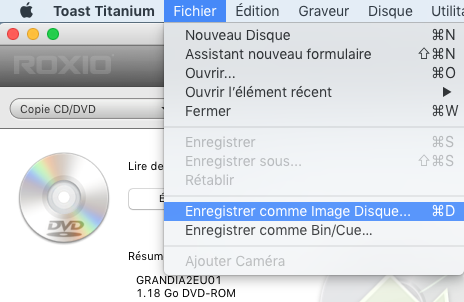
Note also that Toast offers creating images in the bin/cue format just as easily as creating a Toast image. However, we will cover this format below using another free utility.
One might wonder what Toast offers beyond all its options for burning CDs/DVDs.
Perhaps you have encountered read errors with the Disk Utility preventing you from saving certain media.
This frequently happens with "protected" disks or simply those damaged over time and through handling.
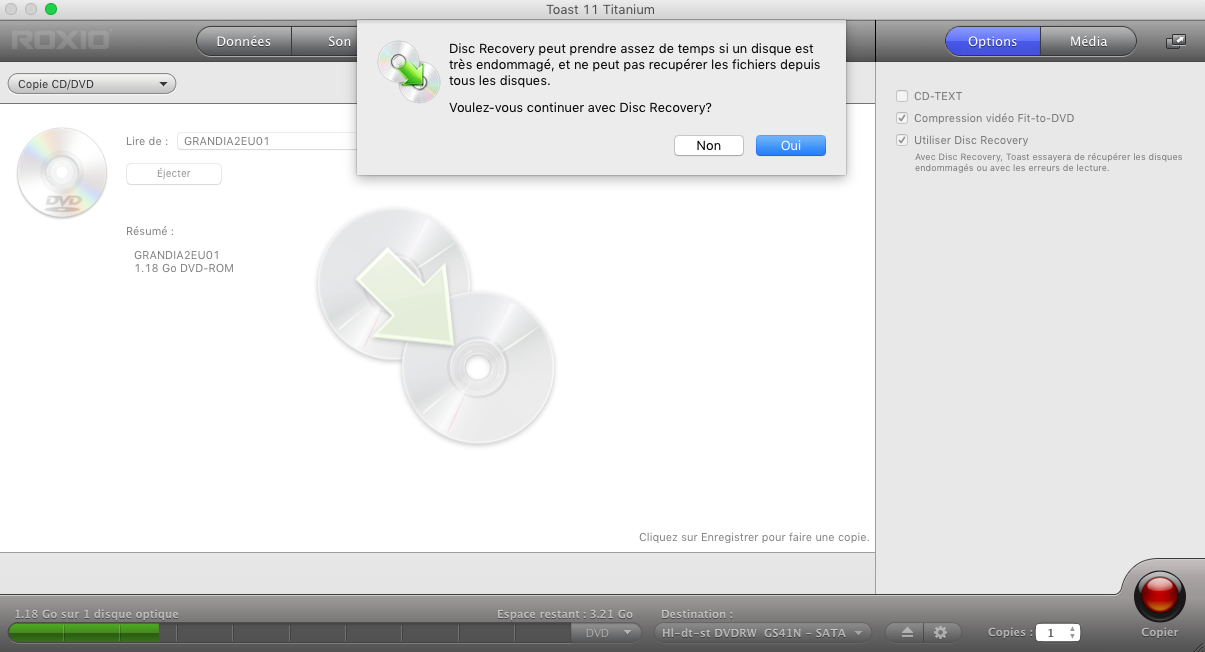
Toast then allows you to bypass these read errors, enabling you to create your backup file, albeit with a processing time that can be quite long.
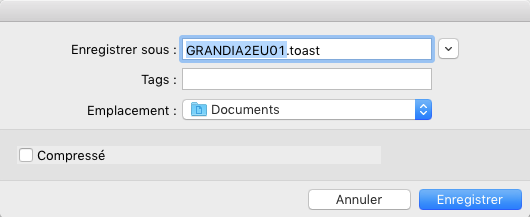
Once the option is checked, in most cases, provided the disk is not physically damaged and clean, the software will successfully create an image file (here Grandia 2 for PS2) without major issues.
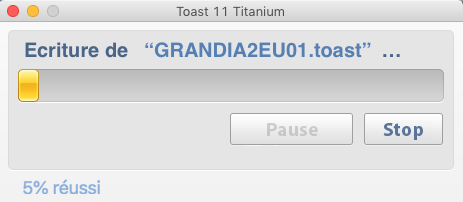
If you notice that the software's progress bar is frozen and hear your drive's motor getting active, this is normal—no explosion to expect. Do not interrupt it and let it work.
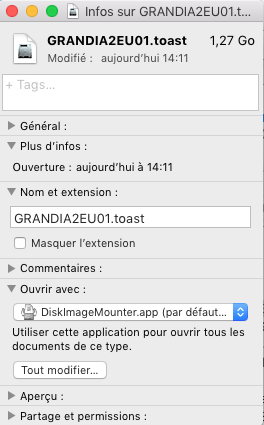
While it must be acknowledged that Toast's wear management is not the best, I have sometimes had to wait an entire night to obtain the final image of a significantly damaged DVD.
Once done, you will be able to leave your original at rest permanently and use your backup without hesitation.However, not all media can be recovered; I had to abandon the process a few times after more than sixteen hours of work.
Since OSX is a Unix, we will describe below the various command-line instructions for creating a disk image from a terminal for those who are resourceful.
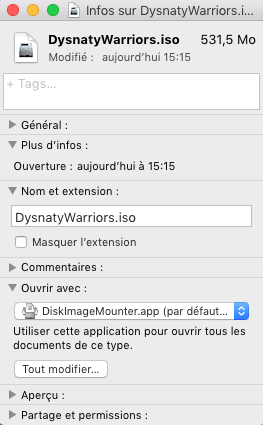
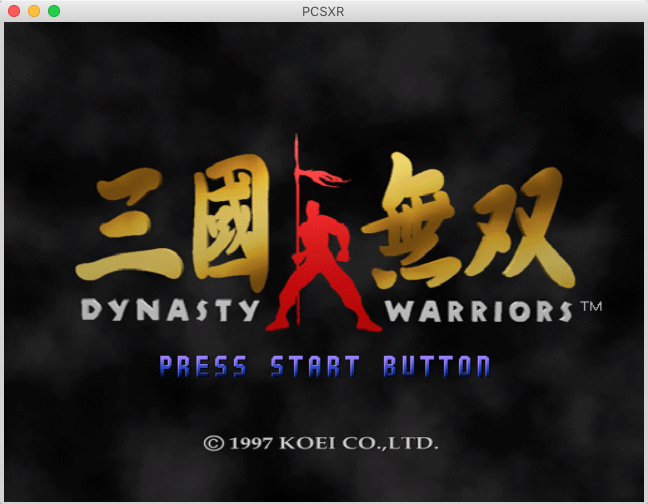
In the example below, I will use the PSX game Dynasty Warriors, which generates read errors with the Disk Utility.
The first thing to do after opening the terminal is to run the following command:diskutil list | grep CD_partition_scheme
You then need to look among the various media descriptions for the one corresponding to the volume you wish to save.

Once found, note the identifier and unmount the volume using the following command...

All that remains is to generate the disk image with the following "dd" command:

Once the terminal returns control to you, the file is then usable.
macOS Formats
The first known formats under Mac are undoubtedly the dsk and img or image (sometimes named ima). It is generally not necessary to convert such formats as they are usually those used by old Mac emulators.
While opening them is possible, especially with emulation, converting them is often less straightforward, with limited practical benefit.
This is perhaps less true for a disk image in img format, since they are generally fully readable and therefore easier to manipulate, even though newer macOS versions have become unable to write data to them, even if the volume is writable.
However, be sure to check that your img file is indeed a format generated on macOS, as this same extension exists under Windows for the same purpose, but obviously with a different file system. For example, you may find diskette boot images for old Microsoft systems with the same extension.
In the case of an IMG file created under Windows, there is a utility that can convert it to ISO, though the result is unfortunately not guaranteed.
However, note that the utility named "iat", whose sources are available here, can be installed directly via Homebrew using the following command: brew install iat. It is used via the terminal with the following command:iat -i <my_image_file> -o <my_iso_file> --iso
With OSX came the DMG format, although some created under PowerPC architecture may sometimes be problematic on our recent systems.
For these tricky cases, you might try the dmg2img utility, which allows you to create HFS+ images from your DMG format.
To do this, retrieve the program's sources from the official site to compile them.
Then run the executable with the following command:dmg2img -i example.dmg -o example.img
Otherwise, you will not have many reasons to modify your DMG file into an ISO, but if you feel like it, the terminal remains the fastest way thanks to the following two commands:
hdiutil convert /path/to/example.dmg -format UDTO -o /path/to/example
mv example.cdr example.iso
Conversely, to convert your ISO into a DMG, the built-in Disk Utility remains the most effective native method, following the same procedure as for Toast files, described above.
Bin/Cue Format
This is a format not natively supported by OSX, but some software and quite a few emulators have begun to support it. As mentioned earlier, Toast was one of the first macOS applications to integrate this format, allowing you to generate Bin/Cue files and also mount them (when it succeeds).
The particularity of this format is that it uses a text file with the "cue" extension, describing the media structure and its various tracks. Thus, with a "cue" file, you can have multiple files and not necessarily a "bin" file. You may sometimes find the ISO file instead, or even other more exotic formats.
When the media contains audio tracks, these are often converted into WAV, MP3, or OGG files.In the case of a simple bin/cue image, it is possible to convert this format into ISO. To do this, you need to retrieve the bchunk utility from the official site and use it as follows, in the command line:
bchunk <file>.bin <file>.cue <file>
This will produce an output file named <file>.iso. However, like any Unix tool, you must be very careful with file paths and filenames. Avoid any special characters, and if you need to modify the filenames—especially the one with the "bin" extension—do not forget to update the corresponding name in the "cue" text file, since this file describes the media and contains the name of the "bin" file.
Note also that for each track on the media, an ISO file will be created in case of data, or a WAV file in case of an audio track.
Since this is an emulation site, you may have noticed the PSX option of the tool. Indeed, to convert your bin into a PSX-compatible ISO, you will need to add the -p parameter to the command line.
Convert ISOs to bin/cue
We know how to convert a bin/cue into ISO format. However, in the world of emulation, there are sometimes emulators that prefer bin/cue as input format. That is why we will see how to perform this transformation. For this, we will use the poweriso tool.
PowerIso is paid, but on macOS, it is available for free in command line mode.
It supports three formats: ISO, BIN, and DAA (and apparently also NRG). We will not describe all possible combinations as they are, in essence, very similar to each other. Thus, to convert your ISO into bin/cue, simply type the following command:
./poweriso convert <mon_fichier_iso> -o <mon_fichier_bin> -ot bin
However, note that the only option is the output format, so the conversion is quite basic.
This means that while I had no issues converting my Sega Saturn games, I had a lot of trouble converting my PSX games, which were no longer recognized.
If you have a file in the daa format, also known as Direct-Access-Archive, you will quickly understand how to convert this PowerIso file to Iso using the following command:
./poweriso convert <mon_fichier_daa> -o <mon_fichier_iso> -ot iso
Nero or the Windows format
The most historically known format is undoubtedly Nero, whose files are recognized by the nrg extension. This format, which appeared on Microsoft's OS alongside the support for burners, seems to be that the early versions of this format were simply the classic iso format with a longer file header. Thus, it would suffice to type the following command in a terminal to convert an old nrg file to iso:
dd bs=1k if=image.nrg of=image.iso skip=300
However, since I don’t have such files to test this, I remain skeptical about this method and would rather use the utility nrg2iso, whose command is as follows, producing an iso file as output:
nrg2iso <mon_fichier_nrg>
It appears that PowerIso, mentioned earlier, also supports the Nero software's nrg format.
The exotic formats
There are many other more or less exotic formats.
We cannot therefore be exhaustive, but in order to provide at least some information, we will present a few of these and especially how to theoretically convert them into ISO, without any guarantee of results.
- B5I (BlindWrite 5 Image, format developed by VSO Software)
A format rarely encountered, if not never in my case, the utility is available on GitHub and seems to be used as follows:
b5i2iso <my_file_b5i> - CDI (DiscJuggler format)
A format widely used by Dreamcast homebrew developers, most console emulators with a spiral support this format by default. However, the utility is also available on GitHub and is used as follows:
cdi2iso <my_cdi_image> <my_iso_image> - CCD (CloneCD format)
Some prototype images shared online, such as Armed for Sega Saturn, use this format. Like the bin/cue format, the ccd file is merely descriptive and accompanied by an img file as well as a sub file. To convert such a format to ISO, you will need to use the tool ccd2iso via the terminal as follows:
ccd2iso <my_img_file> <my_iso_file> - MDF/MDS (Media Descriptor, format used by Alcohol 120%)
A format that has lost much of its prominence since it is no longer updated, it is not impossible to find this format in backups made in the 2000s or mid-2010s. If that is the case, you will need to use mdf2iso as follows:
mdf2iso <my_mdf_file> <my_iso_file> - PDI (Instant CD/DVD) Another format rarely encountered, similar to BlindWrite described above.
pdi2iso <my_pdi_file>Proprietary format that can be found and therefore converted to ISO using the tool uif2iso and used as follows:
uif2iso <my_uif_file> <my_iso_file>
CSO Format for PSP
You will likely notice that the PSP emulator uses both the ISO format and the CSO format, but what is the difference? In fact, the CSO format is a compressed ISO, and this format is what the UMD (Universal Media Disc) of Sony's portable device contains. Thus, it is possible to fit a greater volume of data on the physical medium than the 1.3 GB maximum it offers, even though decompression requires more processing power, thus more battery usage and potentially causing slowdowns.
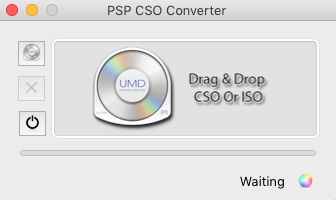
To convert these two formats in either direction, there is a program for macOS named PSP-CSO-Converter. The source code is available, and a build for Intel OSX is downloadable. To perform the conversion from one format to another, simply drag and drop the disk image file onto the interface and specify where to save the resulting file from the process, as it automatically detects the input file format to compress or decompress it into the other output format.

MAME and its CHD Format
MAME and its derivative MESS use a format called CHD for Compressed Hunks of Data. This format includes both optical disk images and hard disk images.
We had already presented a brief overview in another article dedicated to multi-system emulators, in the section reserved for MESS, on how to convert bin/cue files into chd using the tool provided with mame, named chdman. This simply involved running the following command for a CD image:chdman createcd --input <imagecd>.cue --output <nomimage>.chd
However, the same tool can also perform the reverse operation, i.e., extracting bin/cue files from a chd file. To do this, simply execute the following command:
chdman extractcd <nomimage>.chd -o <imagecd>.cue -ob <imagecd>.bin
Be careful, however, with PSX game images, which, once converted to CHD format, do not all seem to be recoverable in a valid bin/cue format.
The ECM Container
A rather specific format, this corresponds to a disk image storing the content without error correction code (ECC) or error detection code (EDC). Like a zip or rar archive, you must use a utility to extract what will often be a bin file.
The utilities unecm and ecm can be found on github.
The command is then:
unecm <mon_fichier_ecm> <mon_fichier_de_sortie>
Xbox ISOs (in bonuxx)
If you want to extract data from the first-generation Xbox format, named XDVDFS, you will need to use the utility xbiso. This one is used in the command line:
xbiso -x <mon_image>
This small collection of utilities and commands is obviously not exhaustive, and there are likely other formats even less known than those we have discussed. But you should now be able to handle the main formats. And for those who have read this far, here are some macOS binaries of the tools described above.
Reply on the forum
A question or a hands-on report? Open the discussion on the forum.