Setting Up Mac OS 9 Networking Through Qemu or SheepShaver
This article is dedicated to advanced users with some knowledge and a certain mastery of networking and the terminal.
Let’s continue our exploration of Qemu’s capabilities with the networking of our freshly installed Mac OS 9.2.2, perhaps with a custom OpenBios. And for those who prefer SheepShaver for emulating their classic Mac OS and who have good networking knowledge, we’ll also see how to do it as the basics are the same.
The solution involves setting up a bridge from your host Mac to your emulated Macs. Once in place, these will have access to your entire local network, as well as the internet if your configuration is correct. If needed, other devices on the network will be able to see your Mac OS 9.
The only downside I’m still working on is that the emulated Macs cannot see the host Mac and vice versa, likely due to network routing issues. This can be quite limiting if your goal, like mine, is to easily share data between your Mac and your Mac OS 9.
Here are some minor details that may disappoint some users:
- having administrator rights
- using the terminal once again, but especially every time you restart your emulator
- installing a third-party kernel
- keeping the emulators running as administrator (and potentially granting them access to your entire machine)
- possibly modifying system file permissions
In other words, even though the risks are measured and explanations are complete, these are not trivial actions and you’ll perform them at your own risk. I cannot be held responsible for any potential crashes on your Mac.
Note also that you need a macOS version of Mountain Lion (10.8) minimum to set up this solution.
For my part, this worked perfectly on Sierra (10.12).Setting up a bridge
To begin, you need to install TunTapOSX, a kernel that will allow connecting the bridge to virtual network interfaces.
The installation is automatic; you just need to download the program and run the package installer.
Things get tricky from here!
Open a terminal and execute the following command
ifconfigto find the network connection used by your macOS on your local network, i.e., the one containing your IP address. If you're wired, it will likely be en0 (be careful on Mac Pro models, with the two internal network cards, it might be en1 instead), if you're using Wi-Fi, it will probably be wlan0.
In all cases, you must check to be sure!Let's create the bridge
sudo ifconfig bridge0 createattach our connection to it (replace en0 with the connection found in ifconfig)
sudo ifconfig bridge0 addm en0and finally activate this somewhat particular network connection:
sudo ifconfig bridge0 upYour bridge is now in place and waiting for connection(s).
Keep this terminal tab/window open, as we'll need it later.
Network Configuration for Qemu
To enable networking in Qemu, you need to complete the command line used to launch the emulator to indicate network support.
Open a new tab to launch Qemu, with a small addition to the usual command:
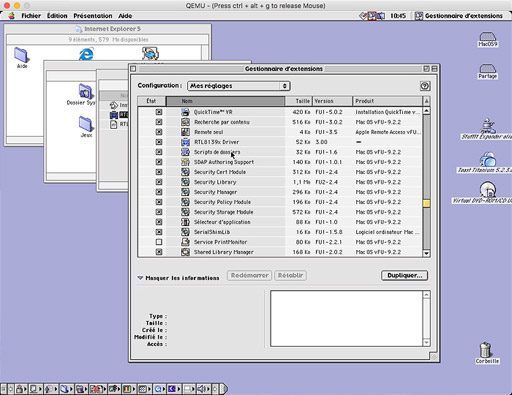
-netdev tap,id=network01,script=no,downscript=no -device sungem,netdev=network01Unfortunately, support for the "sungem" network card did not work for me, so I continued using a Realtek 8139 network card, likely the most compatible card from that era, but requiring the addition of a driver in Mac OS 9.
To do this, you need to download the driver from the Realtek website (dead link) which still offers its driver for Mac OS 9.
And add it to Mac OS 9; it is simply an extension to enable.

Once the network card is supported in Mac OS 9, you can shut down the emulated Mac and we will restart it with network support. For this, you need to add
-netdev tap,id=network01,script=no,downscript=no -device rtl8139,netdev=network01sudo qemu-system-ppc -bios openbios-qemu.elf -L pc-bios -boot c -m 512 -M mac99 -prom-env "auto-boot?=true" -prom-env "boot-args=-v" -prom-env "vga-ndrv?=true" -drive file=MacOS9-fr.img,format=raw,media=disk -drive file=Shared.img,format=raw,media=disk -device usb-mouse -device usb-kbd -netdev tap,id=network01,script=no,downscript=no -device rtl8139,netdev=network01sudo ifconfig bridge0 addm tap0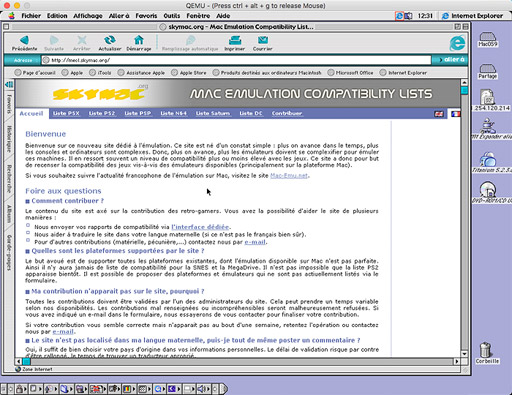
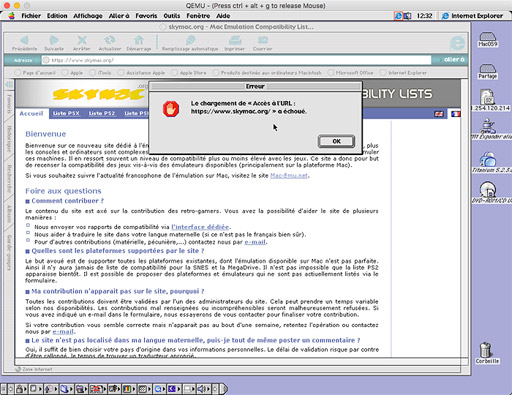
Worse, as soon as HTTPS is involved, the connection simply fails because it lacks the latest security technologies and its certificate database is outdated.
I was still able to launch MECL, a site I created a long time ago and which does not necessarily use the latest technologies.
By default, with the command provided, QEMU will use the tap0 interface, but it is possible to use another interface by adding an additional parameter, for example, to use interface 2
-netdev tap,id=network01,ifname=tap2,script=no,downscript=no -device rtl8139,netdev=network01This modification becomes useful when you want to run multiple QEMU instances; you will need to assign them different interfaces, as well as a different MAC address on the device
-netdev tap,id=network01,ifname=tap2,script=no,downscript=no -device rtl8139,netdev=network01,mac=52:54:00:12:34:66Note that the default MAC address used is 52:54:00:12:34:56.
Finally, another trick: it is possible to automatically mount the connection by specifying a script that will handle it automatically.
In a plain text file named tapup.sh, write
#!/bin/sh
ifconfig bridge0 addm $1
and save it next to your disk image.
Similarly, write the tapdown.sh script to automatically unmount the connection
#!/bin/sh
ifconfig bridge0 deletem $1
You just need to specify them in your command
-netdev tap,id=network01,ifname=tap0,script=tapup.sh,downscript=tapdown.sh -device rtl8139,netdev=network01Thus, you no longer need to manually start the connection.
Network Access Verification
Like me, you may have forgotten, but Mac OS 9 was not originally designed for networking. It was an OS intended for local use, with a network management layer added later.
After launching the "Address scan" on both virtual machines, I went to the Retropie, which is ultimately a Linux with a dedicated interface to see the result:
pi@retropie:~/RetroPie/roms $ arp -a
? (192.168.1.254) at 00:07:cb:b1:2a:f8 [ether] on wlan0
? (192.168.1.28) at 52:54:00:12:34:56 [ether] on wlan0
? (192.168.1.3) at 00:25:00:ee:2e:98 [ether] on wlan0
? (192.168.1.29) at fe:fd:00:00:5d:0f [ether] on wlan0
The Pi clearly sees, in order, the router, Mac OS 9.2.2 on QEMU, my Mac running macOS, and Mac OS 9.0.4 on SheepShaver.
Network Configuration on SheepShaver
As I am stubborn, I wanted to verify this special behavior of the "bridge" mode. I proceeded to configure the network on SheepShaver, even though it is less useful since we have access to a shared folder that allows for easier data transfer from the main Mac to Mac OS 9.0.4.
The official solution is, like with Qemu, to launch SheepShaver from the command line, prefixed with sudo, to allow it to access the tap interface.
The main prerequisite is that the paths to the main disk files, the shared folder/disk, and the ROM are absolute in the SheepShaver configuration file. No matter where you are in the folder (in the terminal) when you run the command, SheepShaver will always find its files.
In the configuration file as well, you need to specify the network connection on a tap interface. To avoid interference with Qemu's connection, I choose the tap1 interface
ether tap1Then I run the command as stated in the documentation
sudo /Applications/Emulation/SheepShaver/SheepShaver.app/Contents/MacOS/SheepShaver & sleep 10or you should replace my SheepShaver application path with your own.
Unfortunately, the result is not correct, with a very explicit outcome:
zsh: killed sudo … and nothing else. If it works for you, there's no need to go through the same workaround as mine.
Indeed, if SheepShaver fails to start in admin mode to access the connection, we will "unlock" the connection by changing its permissions so SheepShaver can access it.
sudo chmod 0666 /dev/tap1Thus, I can start the SheepShaver application simply by double-clicking its icon, and it should have access to the virtual connection.
Note that this trick also works with Qemu, allowing you to not run it in admin mode. However, be cautious, as I am not sure of the implications this modification could have on the system or its security.
Once SheepShaver is launched, I return to my first terminal to connect the virtual network interface to the bridge
sudo ifconfig bridge0 addm tap1Like with Qemu, you then need to configure Mac OS 9.0.4 in TCP/IP.
The results are strictly the same, here with the ancestor of Firefox, Mozilla 1.1
It is possible to access the internet on non-SSL websites and enjoy an old-fashioned display.
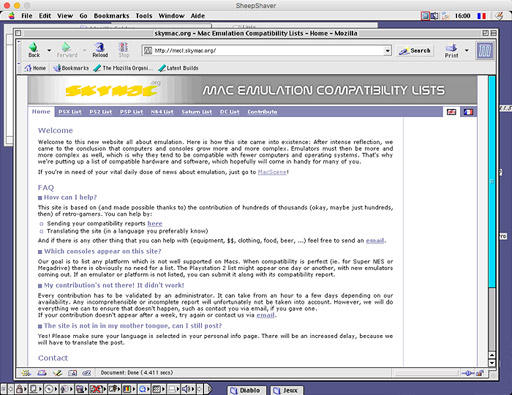
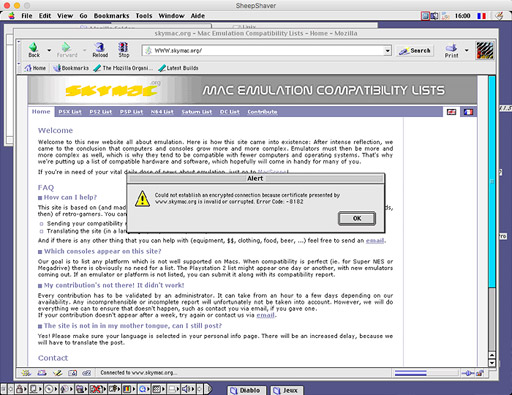
You can see the entire local network, but it is impossible to connect to the host Mac, which remains invisible on the network.
Note that SheepShaver loses some stability once the network is activated. For example, it is impossible to launch the latest version of Internet Explorer 5.5.
For fun, connecting one to the other
Since my initial goal was to find a solution to share data from macOS to Mac OS 9.2.2 (Qemu), with a solution as easy as on SheepShaver (Mac OS 9.0.4), without having to restart Qemu every time you want to transfer a file, here is an alternative, not necessarily as easy, but frankly fun!
Nothing prevents us from running Qemu and SheepShaver at the same time! Just be careful with the RAM allocated to the two virtual machines, leaving some for your macOS.
Let's start both emulators and, in the terminal, reactivate the two bridge connections, since I remind you that they need to be reactivated every time the emulator is launched (with or without scripts).
Now that we have both Mac OS 9 versions running, activate the file sharing on 9.0.4 in the corresponding control panel, if everything goes well and the necessary extensions are available, it should start without issues.
Go back to 9.2.2, and open the Network Browser, and, voila, it appears directly.
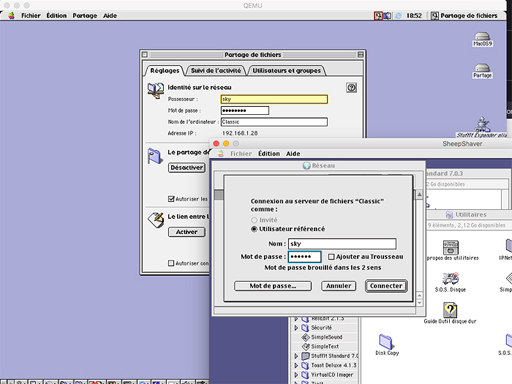
I can thus access the documents from Mac OS 9.0.4 on Mac OS 9.2.2. Note that the opposite is also true; it is possible to activate sharing on 9.2.2 and access it from Mac OS 9.0.4.
Unfortunately, it is not possible to share the Unix disk from Mac 9.0.4, the shared folder between macOS and Mac OS 9.0.4 (I hope you're still following along).
However, I can still copy files from Unix to the Shared folder on 9.0.4 and access them later from 9.2.2, without having to restart each time. A half-success!
Cleanup
Once your emulators are stopped, you can, if you wish, remove the bridge created via the command
sudo ifconfig bridge0 destroyThe bridge is normally kept indefinitely, even after a reboot, and its presence does not interfere, even if it is not used.
However, be careful if other software uses this bridge, they may also be disconnected.
Update
While writing the article, I finally found how to make the host system and its guests visible. To do this, simply assign an IP address to our bridge indicating a new subnet, right after its creation
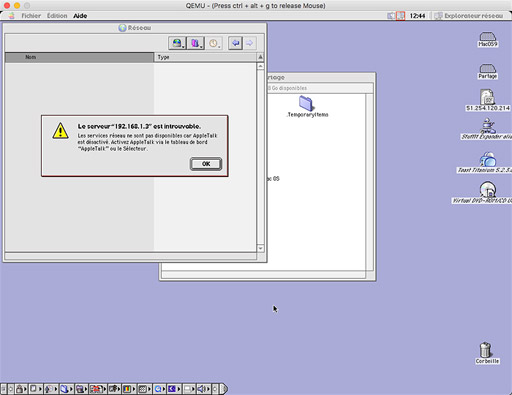
sudo ifconfig bridge0 192.168.2.1/24then configure the Mac OS 9 systems in this new network, with an IP address in the 192.168.2.xxx range. Unfortunately, we have two problems: Without NAT configuration, the Classics lose access to the internet and all other devices on the local network. Second problem, upon connection attempt, we get
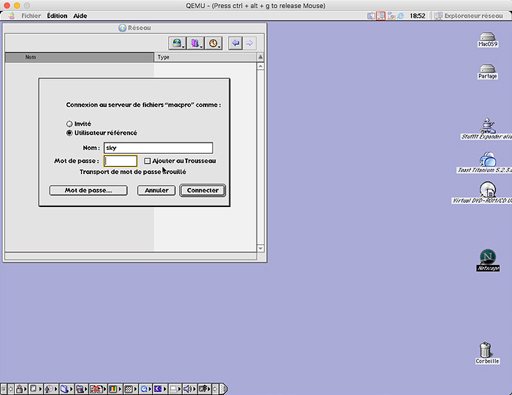
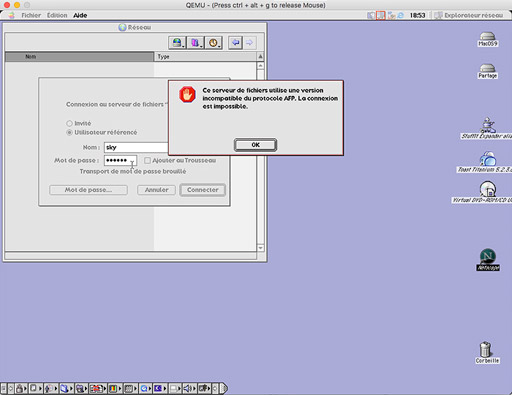
which, ultimately, doesn't get us any further.
The sequel next episode...
Related software
Reply on the forum
A question or a hands-on report? Open the discussion on the forum.