Installation d'une RetroPie
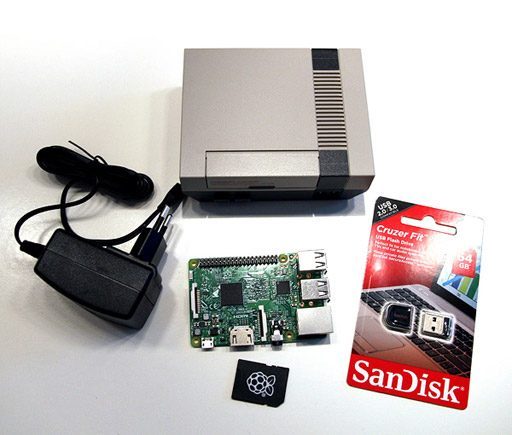
Today, let's step away from the Mac a bit but still within one of our favorite fields: retro-gaming, with the installation of RetroPie.
I was impressed by the ease of installation; it took me less than an hour to set up the basic configuration and launch a first game, and even that could have been faster with a less complex network setup (detailed later). This task is now within everyone's reach.
Here is a step-by-step guide to installing RetroPie with a few nuances or tips to know.
What is RetroPie?
RetroPie is simply the installation of an operating system dedicated to retro-gaming, and therefore to emulating games available on old platforms on a Raspberry Pi.
If you're not familiar with it, the Raspberry Pi is a microcomputer costing around thirty euros, on which you can install a multitude of operating systems dedicated to a single task, as we will see here, or more general ones to turn it into a portable microcomputer or server.
Once RetroPie is installed, you'll have access to over thirty platforms and therefore potentially thousands of games.
Prerequisites
If you embark on this pleasant operation, you will need:
- A Raspberry Pi 3 starter kit or separate components (Raspberry Pi 3 motherboard, 5V power supply, a Raspberry Pi 3 case, and 1 Micro-SD card). Kits allow you to easily obtain a compatible and ready-to-use set.
- A USB controller; there are many retro models available, but for my part, I used a DualShock 3 controller originally designed for PlayStation 3 that I already owned.
- Obviously, you will need a computer monitor or television with an HDMI port (or a VideoComposite port, but HDMI is preferred) to connect the device.
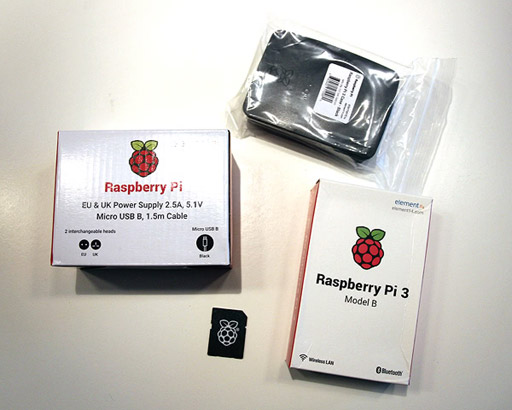
As an option, for my installation, I added:
- A high-capacity USB key, here 64GB. This will allow you to install the ROMs on a removable storage space.

For installation only, you will need:
- A Mac to initiate the installation, which can also be done on Windows or Linux, but the rest of the article will only cover the Mac.
- A micro-SD card reader. Micro-SD cards are often sold with an SD adapter, and sometimes a USB card reader.
- A USB keyboard in case of a WiFi configuration. (The Mac keyboard will do.)
You will also need some ROMs to test. If you don’t have any, they are easily found online with any search engine. Remember that legally you should only have ROMs of games you own in their original form, whether on a disc or cartridge.
Installation
As mentioned earlier, the installation is as simple as it gets. The tools are increasingly complete and no longer require any tweaking to work.
Start by downloading the RetroPie distribution disk image for Raspberry Pi 3 and decompressing it. The built-in archive utility on macOS should handle it without issues.
Then download the Apple Pi Baker utility and note its clever pun.
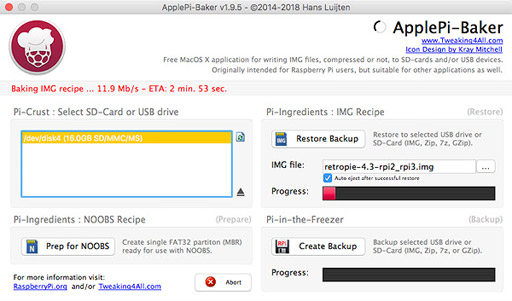
Plug the micro-SD card into your Mac and open the Apple Pi Baker application.
On the left column, select your SD card. Be careful not to make a mistake, as you might risk formatting one of your disks or other SD cards.
On the right, next to IMG File, select the decompressed RetroPie disk image, then click Restore Backup and let it proceed.
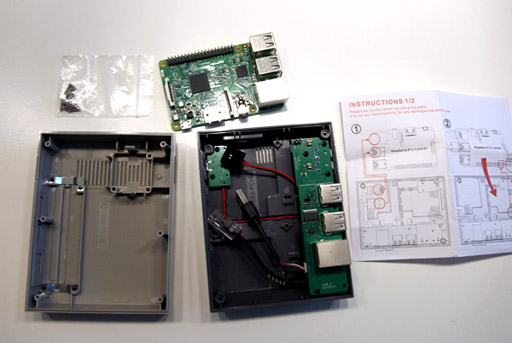
Once the SD card is ready, mount your RPi and insert the card.
Connect your RPi to the selected screen and don’t forget to plug in the USB controller. As soon as you power up the microcomputer, it will boot automatically if you have a standard case (with a NesPi case, you need to press the dedicated Start button) and begin installing the system on the SD card.
Again, everything happens automatically. A nice touch of magic.
Once the installation is complete, you’ll need to configure your controller to map each button to the virtual controller of the system.
And that’s it! It wasn’t any more complicated than that.
Installing ROMs
To simplify ROM installation, by default RetroPie reads USB drives you insert and automatically copies the ROMs into the dedicated folders.
I quickly tested with a folder that ended up scattered across the internal disk of the RPi. In short, I didn’t trust this kind of trick and it only confirmed my doubts.
If you don’t want to set up a network and stop there: Try placing your ROMs in folders with the same name as those found on RetroPie.
Here is the list with the corresponding platform:- amstradcpc : Amstrad CPC
- arcade : Arcade
- atari800 : Atari 800 / Atari 5200 (!)
- atari2600 : Atari 2600
- atari7800 : Atari 7800
- atarilynx : Atari Lynx
- dreamcast : Sega Dreamcast (!)
- fba : FinalBurn Alpha
- fds : Famicom Disk System
- gamegear : Sega Game Gear
- gb : Nintendo Game Boy
- gba : Nintendo Game Boy Advance
- gbc : Nintendo Game Boy Color
- mame-libretro : Arcade MAME
- mame-mame4all : Arcade MAME, version 0.37b5 (July 2000)
- mastersystem : Sega MasterSystem
- megadrive : Sega Megadrive
- n64 : Nintendo 64
- neogeo : NeoGeo
- nes : Nintendo NES
- ngp : NeoGeo Pocket
- ngpc : NeoGeo Pocket Color
- pcengine : PC-Engine
- psp : Sony PSP
- psx : Sony PlayStation
- saturn : Sega Saturn (!)
- sega32x : Sega 32X
- segacd : Sega CD
- sg-1000 : Sega SG-1000
- snes : Nintendo Super Nintendo
- vectrex : Vectrex
- zxspectrum : ZX Spectrum
The folders marked with (!) are not installed by default but correspond to the correct folders for the respective platforms.
For my part, being a lazy person, I prefer to send everything from the Mac without having to get up, through the network. However, this requires going a bit further in RetroPie configuration.
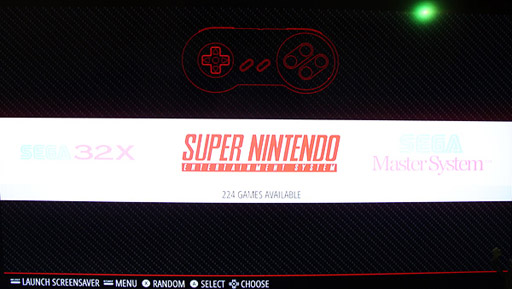
Note that after each new addition of ROMs, you need to restart the EmulationStation software that appears or even the RPi, which is actually easier.
You can perform a reboot from the menu Configuration > RETROPIE SETUP > Perform reboot (or via SSH, using the `reboot` command if you choose the advanced configuration).Thus, on each startup, the ROMs will be checked by the Emulation Station software, and the platforms with enabled ROMs and emulator will automatically appear.
The BIOS files are to be installed in the folder ~/RetroPie/BIOS/.
Network Configuration
If you have a network with DHCP, which is now often the case with a router, simply plug in an RJ-45 cable for the RPi to obtain an IP address and access the internet, and to be accessible on the network itself.
If you have a secured network with the IP address defined according to the RPi's MAC address, select the configuration tool, then the shortcut "SHOW IP" which will give you the MAC address of the network card or WiFi chip depending on your needs.
The SHOW IP tool then allows you to verify that your RetroPie is properly connected to the network by displaying the assigned IP address.
[Optional] WiFi Configuration
The Raspberry Pi 3 version now includes a high-quality WiFi chip by default. Since it is directly integrated into the motherboard, it is easier to provide a driver for all RPi models, unlike previous versions where manual driver installation was required and not always straightforward.
Stay in the configuration tool and access the dedicated WIFI menu, then select "Connect to WiFi network".
Connect a keyboard to your RPi and configure the system to connect to your network. Note that the keyboard will be in QWERTY layout (with a PC mapping that may differ from what is marked on your Apple keyboard), so you may need to adjust the few keys that differ.
SSH Activation
To access RetroPie remotely, you must enable SSH, which is disabled by default.
Follow these menus:Configuration > RASPI-CONFIG > Interfacing options > SSH > Enable
Then reboot RetroPie from the Configuration > RETROPIE SETUP > Perform reboot menu.
By default, the username and password are pi and raspberry. These credentials are the same for everyone, so it is recommended to change the password, especially if your Pi is accessible from the internet. Locally, the risk is relatively low.
A message will remind you of this at every SSH connection.
SSH is enabled and the default password for the 'pi' user has not been changed. This is a security risk - please login as the 'pi' user and type 'passwd' to set a new password.[Optional] Dedicated USB Key Configuration
As mentioned in the prerequisites, I chose to store the ROMs on a USB key. This allows you to remove the key from the Raspberry Pi if needed, to connect it to your Mac for large ROM transfers, for example.
Connect the key to your Pi.
Open a terminal to connect to your RetroPie via SSH:
ssh pi@ip_addressUsing the password mentioned above.
Find your USB key among the connected USB devices:
pi@retropie:~ $ lsusb
Bus 001 Device 006: ID 054c:0268 Sony Corp. Batoh Device / PlayStation 3 Controller
Bus 001 Device 005: ID 0781:5571 SanDisk Corp. Cruzer Fit
Bus 001 Device 004: ID 05e3:0608 Genesys Logic, Inc. USB-2.0 4-Port HUB
Bus 001 Device 003: ID 0424:ec00 Standard Microsystems Corp. SMSC9512/9514 Fast Ethernet Adapter
Bus 001 Device 002: ID 0424:9514 Standard Microsystems Corp. Bus 001 Device 001: ID 1d6b:0002 Linux Foundation 2.0 root hub
The "devices" numbered from 001 to 003 correspond to the Raspberry Pi components, while device 006 corresponds to the PS3 controller. The device 005 corresponds to the USB key connected to the integrated USB hub in the NesPi case.
Finally, our "device" 005 is our USB key, which you can see the brand on—here, it's a SanDisk.Find your device's ID using the following command:
pi@retropie:~ $ blkid
/dev/mmcblk0p1: SEC_TYPE="msdos" LABEL="boot" UUID="F800-84AD" TYPE="vfat" PARTUUID="5728b712-01"
/dev/mmcblk0p2: LABEL="retropie" UUID="0d5d7270-400a-4069-90ce-5547c464af88" TYPE="ext4" PARTUUID="5728b712-02"
/dev/sda1: UUID="2D7E-3D1E" TYPE="vfat"
The line we're interested in starts with /dev/sda1, and we note that the unique ID or UUID is 2D7E-3D1E.
Next, to automatically mount the USB key at every startup, we'll add it to the system's file configuration.
sudo nano /etc/fstabUsing `sudo` allows opening the command-line editor nano as an Administrator, and we'll edit the fstab file in the /etc directory.
Below the two lines starting with #, add the following elements on the same line, separated by tabs:
   UUID="2D7E-3D1E"
   /media/usb0
   auto
   defaults,noatime,user,uid=1000,gid=1000,umask=077
   0 0
Here’s the result:
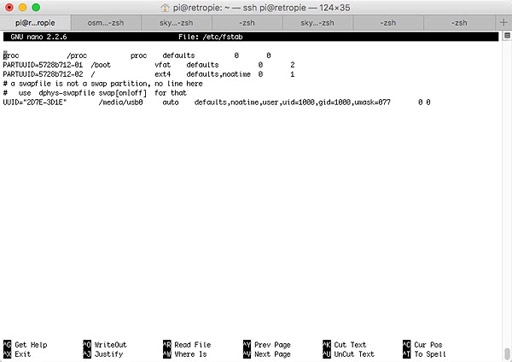
For reference, the first element defines the device ID to locate (you must use your own, not mine), the second is the mount location for the filesystem, the third is the filesystem format, which is vfat as seen with the blkid command but we leave it as auto for simplicity.
The following parameters are associated with file mounting by the system:
- defaults: uses the system's default parameters
- noatime: prevents updating the access time on every file read, as we're dealing with a flash drive, which could otherwise quickly reduce the number of read/write cycles it can handle
- user: allows any user to mount the system
- uid=1000,gid=1000: specifies the user and group associated with the files during mounting; here, 1000 refers to the default account, which is pi.
Finally, the two zeros indicate respectively the system's backup frequency and whether the `fsck` program—also available on macOS—should check this disk at startup. In both cases, we don’t need them.
Don’t forget to add a line break at the end of the line.
To save, type `ctrl+o` then press Enter to confirm.
To quit the editor, type `ctrl+x`. If you made other modifications to the file after saving, it will prompt you to save; otherwise, it will simply exit the `nano` application.
Your key should now mount automatically on the next startup. Test it immediately:
sudo rebootYou will lose control of the `pi` system and return to the macOS prompt.
Check on your TV when your RetroPie has rebooted, then reconnect via SSH and type:
bash
pi@retropie:~ $ ls -l /media/usb0/
total 0
If a total is displayed, even if it's 0, it's fine—your key will be properly mounted every time.
If you get a message like:
bash
ls: cannot access /media/usb0: No such file or directory
It means you made a mistake in your `/etc/fstab` configuration and you need to review this file.
If everything is fine, let's proceed.
Now, copy the RetroPie folder to your key:
bash
cp -r ~/RetroPie /media/usb0/
Then, create a backup of the original RetroPie folder:
bash
mv ~/RetroPie ~/RetroPie_bck
Finally, create a symbolic link from the USB key to the original folder:
bash
ln -s /media/usb0/RetroPie ~/RetroPie
This way, you restore the expected folder for the system while still being able to access the files easily and externally if needed.
Of course, if you need to remove the key, it's best to power off the Raspberry Pi first and only reboot it once the key is reconnected.
Everything is now ready to install ROMs, either via SSH (which doesn’t require shutting everything down) or with the USB key. Make sure to respect the folder structure.
Thanks to Frank for his help with this section, especially regarding USB management on Linux.
Plugins, Packages, and Emulators
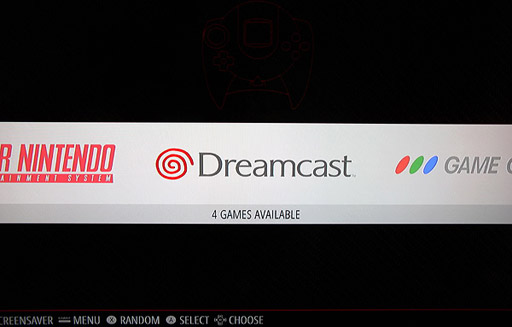
By default, and once again to simplify the installation for everyone, many emulators are already installed, so there’s no need to install them manually. For example, there are emulators for some Nintendo consoles: NES, SuperNES, N64, GameBoy / Color / Advance, or others for Sega machines: MasterSystem, GameGear, MegaDrive, 32X, or even the Sony PlayStation 1, to name just the most common gaming consoles. If, after adding the ROMs in the correct format and folder and performing a proper reboot, the platform still doesn’t appear, it means the emulators are not installed.Just go ahead and install them.
Note that if they are not installed by default, it often means emulation is not very good, or even experimental. However, it remains very fun to test.
To do this, go to Configuration > RETROPIE SETUP > Manage Packages > Manage Optional Packages
Throughout the menus, you can see all the options available to you in terms of installation and configuration, which I will not detail here, as it would be too lengthy.
Let’s get to the point with the installation, for example of a PSP emulator, and find the PPSSPP emulator, which also exists on Mac. Select it and then choose "Install package from binary" and let the machine do its work.
The emulator is then marked as installed.
If the desired emulator is not found in the list of "Optional Packages," you may need to look in the "Experimental Packages".
This is the case for Yabause, the Saturn emulator, or the latest versions of MAME.
Attention, les binaires sont souvent indisponibles et il n'est alors possible que de faire "Install from Sources", ce qui signifie que votre Pi devra compiler les sources pour créer une application, ce qui prendra un peu plus de temps.Après un petit redémarrage, vos nouvelles plateformes devraient être disponibles.
Compatibility and File Formats
Il n'est bien évidemment pas possible pour moi de tester toutes les plateformes et encore moins tous les jeux mais je mettrais cette section à jour de temps en temps au fil de mes expérimentations.
Vous trouverez beaucoup d'informations sur les pages web que je vous ai lié dans les liens utiles, notamment pour savoir quel bios et quel format de fichier il faut pour chacun des émulateurs.
Nintendo
- NES
- File directory: RetroPie/roms/nes
- File format: .7z .fds .fig .mgd .nes .sfc .smc .swc .zip
- BIOS: Included with the system
- Compatibility: Excellent
- Super Nintendo (snes9x)
- File directory: RetroPie/roms/snes
- File format: .7z .bin .fig .mgd .sfc .smc .swc .zip
- BIOS: None
- Compatibility: Excellent
- Game Boy
- File directory: RetroPie/roms/gb
- File format: .7z .gb .zip
- BIOS: None
- Compatibility: Excellent
- Game Boy Color
- File directory: RetroPie/roms/gbc
- File format: .7z .gbc .zip
- BIOS: None
- Compatibility: Excellent
- Game Boy Advance
- File directory: RetroPie/roms/gba
- File format: .7z .gba .zip
- BIOS: None
- Compatibility: Not tested
- N64 (mupen64)
- File directory: RetroPie/roms/n64
- File format: .z64 .n64 .v64
- BIOS: None
- Compatibility: Black screen during all my tests, to be retried
SEGA
- Master System (Genesis)
- File directory: RetroPie/roms/mastersystem
- File format: .7z .bin .sms .zip
- BIOS: None
- Compatibility: Excellent
- Mega Drive (Genesis)
- File directory: RetroPie/roms/megadrive
- File format: .7z .bin .g
File formats:
- .7z .bin .gen .md .sg .smd .zip
- BIOS: None
- Compatibility: Excellent
- Game Gear (Genesis)
- File directory: RetroPie/roms/gamegear
- File format: .7z .bin .gg .sms .zip
- BIOS: None
- Compatibility: Excellent
- 32X
- File directory: RetroPie/roms/sega32x
- File format: .32x .7z .bin .md .smd .zip
- BIOS: None
- Compatibility: Excellent
- Dreamcast
- File directory: RetroPie/roms/dreamcast
- File format: .cdi .chd .gdi
- BIOS: dc_boot.bin, dc_flash.bin
- Compatibility: Currently unsuccessful, 3 tested games, none worked properly.
- F355 Challenge: Starts and allows a race to begin, unfortunately the retro display fills the entire screen, making the game very difficult to play.
- Sega Rally 2: Does not start
- TheLemans 24H: Displays the Infogram logo then exits.
Sony
- PlayStation
- File directory: RetroPie/roms/psx
- File format: .cue .cbn .img .iso .m3u .mdf .pbp .toc .z .znx
- BIOS: SCPH1001.BIN
- Compatibility: Not tested
Others
- Neo Geo
- File directory: RetroPie/roms/neogeo
- File format: .zip
- BIOS: neogeo.zip (to be placed with the ROMs, not with the BIOS)
- Compatibility: Not tested
Useful Links- RetroPie Homepage: The foundation for everything, allowing you to download the operating system and access comprehensive, detailed help on installation and configuration.
- RetroPie Setup Pages on Github: There are numerous configuration help pages for RetroPie, including documentation for each supported platform with BIOS, accepted ROM formats, and button mappings for controllers for each emulator.
Reply on the forum
A question or a hands-on report? Open the discussion on the forum.