Getting Started with MAME on macOS - Part 2 - Installation and Configuration

Now that you know what MAME is and what you can expect from it, here’s how to install the emulator and launch your first games.
Installing MAME via Homebrew
Yes, MAME is available on Homebrew. If you have the package manager, you can easily add MAME to your list of software. Otherwise, you can install Homebrew or simply try the SDLMAME option.
To install the software:
brew install MAME
Homebrew will automatically install the necessary dependencies for MAME to function properly.
To launch MAME, simply type mame in your terminal.
Advantages:
- Automated dependency management
- Presence in the PATH
Disadvantages:
- Updates take several days to arrive
- Sometimes skips a few versions
Installing SDLMAME
SDLMAME is a port of MAME with the advantage of being multiplatform, including the Mac. It uses the SDL library in its version 2, which must be installed before using MAME. This is the only surviving solution among the options I mentioned to you 12 years ago.
To install the software, start by installing the SDL2 library:
https://github.com/libsdl-org/SDL/releases
Then download SDLMAME, whose Mac version is available on this site:
Extract the .zip file and copy the mame folder, along with all its files, to your chosen location.
To start the emulator, drag the mame64 file into a terminal and press Enter.
Advantages:
- Updates are available at the same time as those of MAME
Disadvantages:
- The application launch is not the most pleasant, unless you place the application in the PATH
Which one to choose?
Whether it’s SDLMAME or MAME via brew, it is necessary to use the terminal. If the terminal scares you, know that once launched, it is no longer necessary.
There is really very little difference between the two. You can even use both applications if you wish. All the more so since both applications work the same way and use the same files (configuration, ROMs, artworks…)
From now on, when I speak of MAME, it will refer to the version of MAME you have chosen, without distinction.
MAME Configuration
The many possibilities offered by MAME require a configuration phase, which is mandatory.
Configuration can be done either manually by editing the configuration files, or via the interface. I find that both solutions have their advantages and disadvantages.
With the interface, the chances of errors are reduced, but it is not always the most pleasant or the fastest to use. Therefore, for example, to specify the paths to the different files, I prefer to modify the values manually, in the configuration files. For the rest, the values cannot always be known in advance, and it is therefore preferable to use the interface.
But to keep it simple, we will see both methods. Thus, you can choose, or like me, take advantage of both solutions.
Manual Editing of Configuration Files
If no configuration file exists, you need to create them. The easiest way is to ask the application to do so. Launch MAME, adding the parameter -createconfig.
The application will not launch. Instead, you will find in your user directory, 2 or 3 new files:
- mame.ini
- plugins.ini
- ui.ini
These files have the advantage of containing the default configuration of the emulator; you just need to modify the values you want.
In your user library folder, in the Application Support directory, create a folder named mame. Then move the files into it.
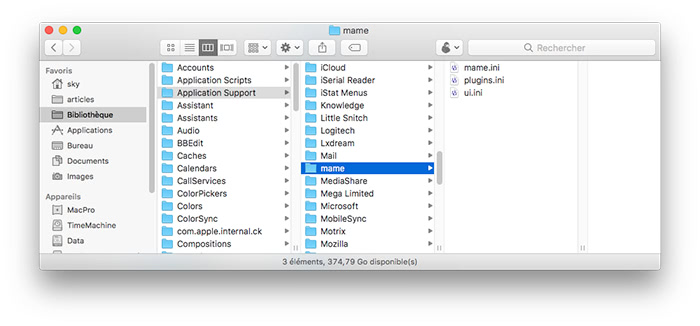
The mame.ini file is the most important; it includes all the application configuration. The ui.ini file will allow you to configure the interface. And the plugins.ini file will remain empty for quite some time, as plugin usage isn't the most important at the moment.
To begin the installation, we will specify the path to the folder containing your ROM collection.
Open the mame.ini file with a simple text editor. Avoid using Word, and if you use TextEdit, make sure the file remains in plain text format.
On line 11, next to rompath, specify the path to your ROMs folder. I recommend using the full path. For example, my path is:
/Volumes/Data/ROMs/MAME/ROMs
If you need to add multiple folders, separate them with a semicolon.
/Volumes/Data/ROMs/MAME/ROMs;/Volumes/Data/ROMs/MAME/ROMs2
Save.
A little further down, starting from line 27, there are other paths to configure. If you leave them as they are, MAME will create many folders at the root of your user account.
If you want everything neatly organized, you need to specify these paths. On my side, I chose to place them next to the configuration files, so everything is grouped together.
cfg_directory             "$HOME/Library/Application Support/mame/cfg"
nvram_directory           "$HOME/Library/Application Support/mame/nvram"
input_directory           "$HOME/Library/Application Support/mame/inp"
state_directory           "$HOME/Library/Application Support/mame/sta"
snapshot_directory        "$HOME/Library/Application Support/mame/snaps"
diff_directory            "$HOME/Library/Application Support/mame/diff"
comment_directory "$HOME/Library/Application Support/mame/comments"The nvram folder will contain the game data saved by the games.
The sta folder will contain the saved game states created by the player, to resume sessions later.
The snaps folder will contain the screenshots taken by the player. The inp, diff, and comments folders are less commonly used, but allow storing respectively input management, broadcasts, and comments.
MAME Configuration via the Interface
Using the interface, configuration files will be automatically created as soon as the user modifies a configuration element that differs from its default value.
Open MAME! Let's see how the interface works.
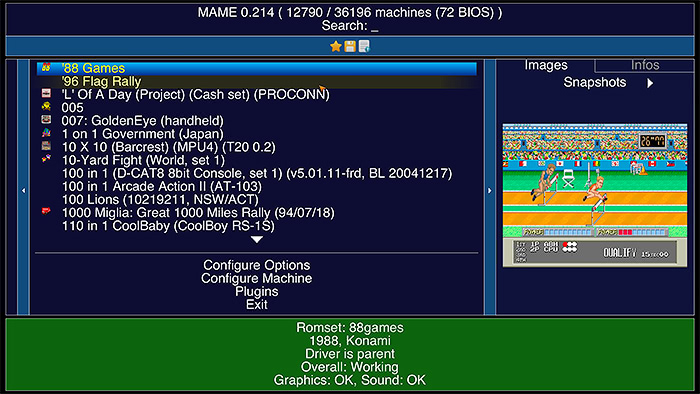
By launching MAME without any option, you'll arrive at the MEWUI interface, which allows displaying the list of games, searching for them, showing game information, and optionally sorting and filtering them.
At the top of the interface, the MAME version followed by the number of games corresponding to your active filter, and then the total number of machines MAME knows. Finally, in parentheses, there is the number of BIOS files present in your collection.
Below that, there is a search bar. Very efficient and fast, even when you have a large collection.
To the right of the game list, there is a panel that can be minimized, showing different images as well as the info on the selected game.
Below that, there are four buttons; double-click the first one: "Configure Options".
Double-click "Configure Directories", then select the folders to configure, and follow the prompts. The folder selection interface isn't very user-friendly, but at least the paths will be error-free.
The most important thing is to configure the ROMs folder, but just like with manual editing, it is preferable to configure the other folders so that MAME doesn’t clutter your user directory.
Then go back one step, then double-click on Filter. Select Available by double-clicking on it. Then select Return to previous menu.
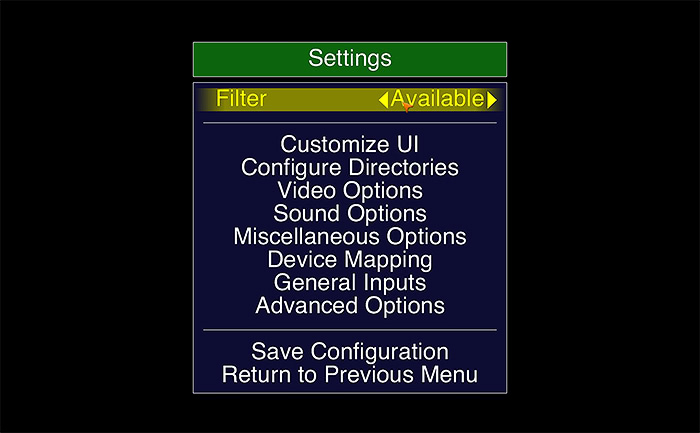
By selecting Available, we ask MAME to display only the games that are available and for which you have the ROMs. You can also use other filters according to your needs.
Save the configuration by selecting Save Configuration, then return to the list of games with the Return to previous menu button.
If you didn’t make a mistake in the path of your ROMs folder and your ROMs are indeed MAME ROMs, you should see the list of your ROMs displayed.
Keyboard Configuration
For keyboard configuration, it is preferable to use the interface, as this configuration is not found in a simple text file like the rest of the settings.
MAME uses XML files, which are more difficult to edit manually. The emulator uses a rather clever system. It has a general configuration that it will apply to all games. However, if you want a different configuration for a specific game, it is possible to create a dedicated configuration.
In Configure Options > General Inputs, you will access the general configuration.
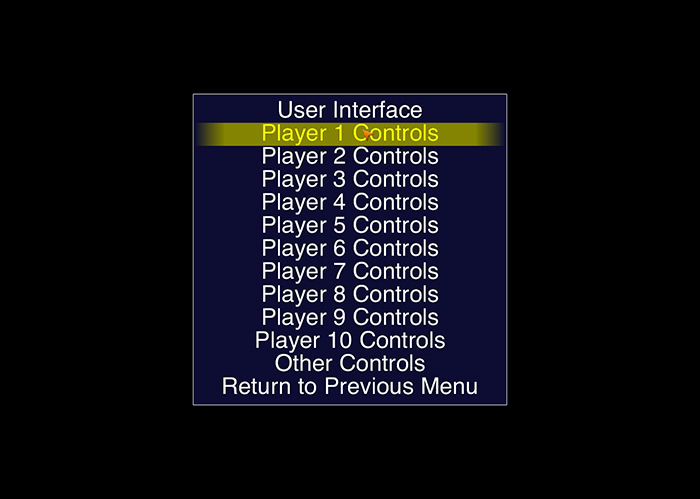
The User Interface section allows you to adjust the keys used for interface management. Personally, I find this part doesn’t require any changes, it is well set up as it is. But that doesn’t prevent you from doing your own.
The most important part is in the Player 1 Controls section, and be careful, the list here is also very long.
However, you can limit yourself to the keys you need. For classic games (Metal Slug, Street Fighter, World Rally, etc.), it is necessary to configure the joystick as well as the 6 buttons, even if they are not always used.
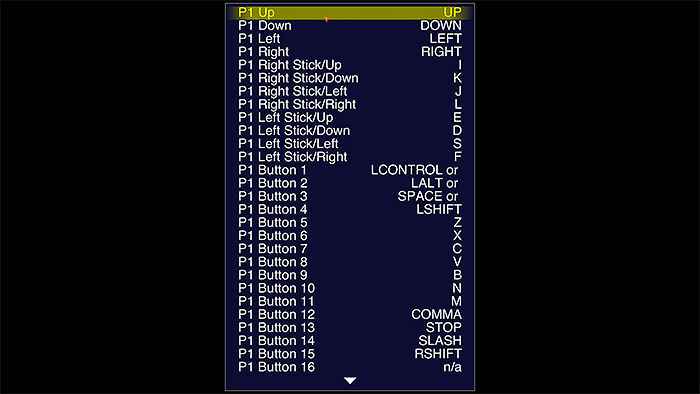
I recommend configuring at least the following:
- P1 Up: Joystick Up
- P1 Down: Joystick Down
- P1 Left: Joystick Left
- P1 Right: Joystick Right
- P1 Button 1: Button 1
- P1 Button 2: Button 2
- P1 Button 3: Button 3
- P1 Button 4: Button 4
- P1 Button 5: Button 5
- P1 Button 6: Button 6
And since this is arcade game emulation, don’t forget the following two keys:
- P1 Start: Start Button
- P1 Select: Select Button or Coin Insert
Indeed, don’t forget to add coins via the Select key to be able to play.
If you want to play with two players, you will need to configure the keys under Player 2 Controls.
And if you want to create a special configuration for a particular game, you must go to Configure Machine from the main menu and start over.
Launching Your First Game
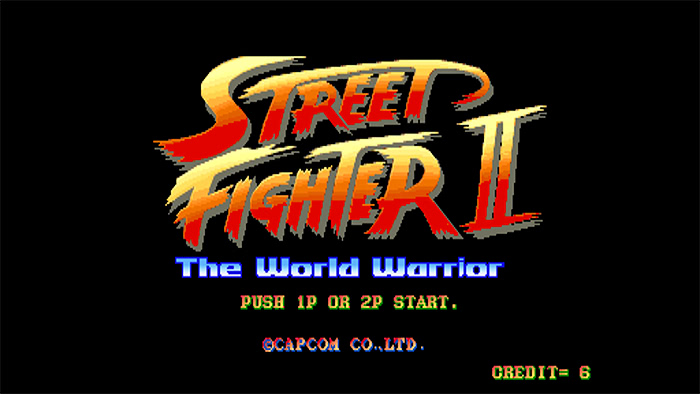
Once the configuration is done to launch a game, simply double-click its name in the list.
If the game is marked as Working and your ROM is correct, it should launch. Otherwise, MAME will indicate the issues. This is often due to a missing element in the ROMs, in its parent if it's a clone, or if the BIOS is missing or incomplete.
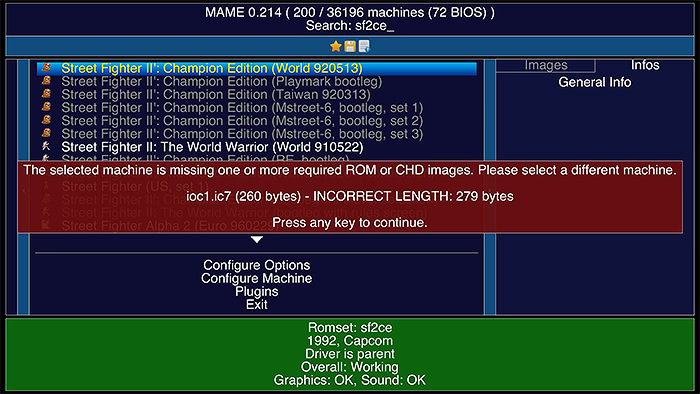
In this case, you can try using a clone or search for a higher-quality ROM.
To quit the game, press the Escape (ESC) key.
Once in the interface, to exit MAME, double-click on Exit or press the Escape (ESC) key.
Enjoy your favorite arcade games!
Related software
Reply on the forum
A question or a hands-on report? Open the discussion on the forum.